Move ideas forward
Turn early drawings into material you can discuss and refine.
From rough lines to rich ideas
Give a drawing more depth, texture, and atmosphere while keeping the spark that made it yours.
The idea
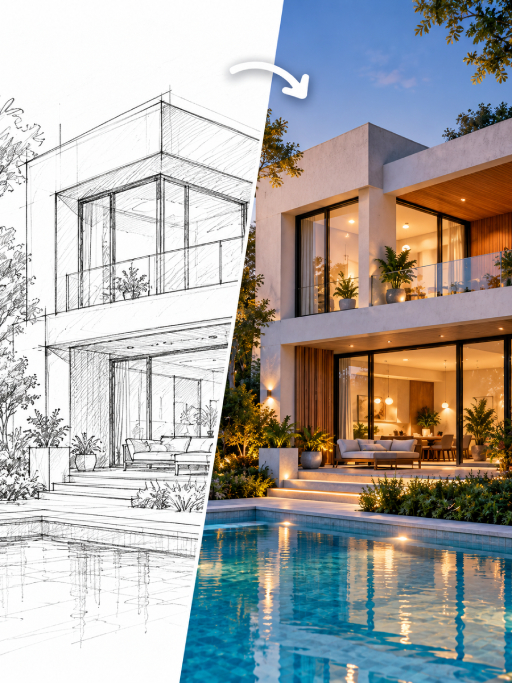
A quick sketch can say a lot. Use its shapes and composition as the foundation for a more finished visual, whether you are designing a character, product, or scene.
What you can do
Turn early drawings into material you can discuss and refine.
Let your own composition guide the visual.
Explore color, materials, and atmosphere around the same sketch.
How it works
Create a clear sketch with the main shapes in place.
Describe the look, materials, colors, or mood you want.
Compare versions and keep developing the strongest one.
Made for your ideas
Good to know
Keep exploring
Sketch interpretation develops a drawing into a more detailed visual.
Use clear silhouettes and label important materials. State which parts of the drawing should remain structurally fixed.
New AI tools require a real model integration before use. Existing studio integrations require sign in and a configured provider. Reference images may be sent to an external processing service; review the privacy policy before submitting sensitive material.
Use the existing workspace on this page or follow its link to the current Photolisa workflow. This guide does not add new processing capabilities.
Use clear silhouettes and label important materials. State which parts of the drawing should remain structurally fixed.
The current workspace determines the available inputs and settings. The guide describes concepts to review and does not expand the formats accepted by the existing tool.

Pencil sketch styling emphasizes outlines and light tonal shading.
AvailableDescribe a scene in words to plan an original image, including its subject, lighting and composition.
Existing toolPhoto restoration addresses fading, scratches and damaged areas in an old scan.
Existing toolAI upscaling estimates extra pixels to produce a larger image from a smaller source.
Existing toolColorization interprets likely colors in a monochrome photograph.
Existing toolReference image variation explores alternative compositions while retaining a starting visual idea.
Existing tool